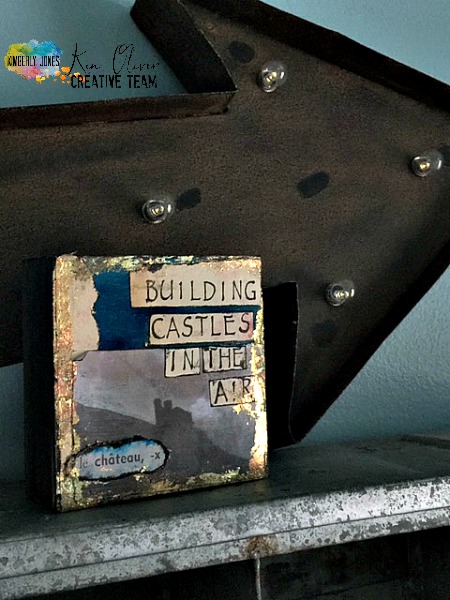
Castles in the Air Color Burst Collage on Wood
On cozy winter evenings you'll often find me lost in a reverie and dreaming about the days to come. There's something about the idea of a fresh new year that inspires me to plan and to dream big! For my latest Ken Oliver Creative Team project, I wanted to create a collage to remind to myself to keep on dreaming and building castles in the air long after the new year has lost its luster.

I love experimenting with Color Burst and a variety of materials, and I couldn't wait to see what would happen when I paired this magical elixir with wood.

As usual, the results were simply sublime! The sides of this 4 x 4 cradled birch block turned a rich espresso hue when brushed with Sepia Color Burst mixed with water and just a sprinkle of Ultramarine Blue. The beauty of Color Burst lies in its unpredictability, so you'll have to experiment a bit to create the color that pleases your eye. For the background, I spritzed the top of the block with water and then sprinkled on Ultramarine Blue Color Burst. Set the block aside to dry for a few minutes while you prep the papers for your collage.

I like to use these porcelain dishes to mix my Color Burst. Just a tiny sprinkle with a few spritzes of water yields enough watercolor to stain a vintage french flash card, and as seen in the next image, a piece of vintage book paper. An Aquash brush filled with water makes it easy to add a wash of color.

One of my favorite ways to add text to a collage is to use rubber stamps and ink. Ken Oliver's Pegz Uppercase Stamps and Lamp Black Click It Ink Pad are fun and easy to use. I love how the stamps connect together. If you don't have enough letters for the entire word, it's very easy to just stamp out what you have and then add the missing letters at the end. I added a bit of Sepia Color Burst to this book page, cut out the words, and then edged them with the Lamp Black Click It Ink Pad to make them stand out from the background. One of my favorite tips is to use the blank endpapers from old books or pages that don't have much text on them to stamp out your words for instant vintage patina!

After the Color Burst stained block was dry, I used Yes Stikflat Glue and a palette knife to adhere the various elements. The castle image is a copy of a vintage photo from my stash simply printed on light weight paper. I tore the flash card, added some Ultramarine Color Burst and edged it with the Lamp Black Click Ink It Pad. I also used the ink pad to edge the wood block and frame the composition. At this point the collage didn't feel quite complete. It needed something to meld all the elements together. After staring at it for a bit, I decided to add some Rose Copper Leaf Metal. I simply spread a bit of Yes Glue in random places around the edges of the collage and then tapped on the metal leaf and brushed off the excess.

I hope you enjoyed this tutorial and that you will have fun creating your own castles in the air. I've included a list of materials used in this project with links below. Questions about the project are always welcome!
Materials:
Sepia Color Burst
Ultramarine Blue Color Burst
Pegz Uppercase Stamp Set
Lamp Black Click It Ink Pad
4 X 4 Deep Birch Panel
Rose Copper Leaf Metal Sheets
Yes Stikflat Glue
Vintage French Flash Card
Vintage Book Paper
Spray Bottle filled with Water
Paintbrush of your choice
Paper Towels
Optional:
Porcelain Nesting Bowls
Pentel Aquash Waterbrush
*A Note about Adhesives
Please feel free to use your favorite adhesive for this project. Matte medium or a good glue stick will work very well. Any type of wet adhesive will require a longer. drying time of course. Yes Stikflat Glue is my new favorite because it's easy to spread with a palette knife, dries very quickly, works well with delicate vintage papers, and allows the papers to lie very flat.


Great job, Kim! The metal leaf is the perfect addition!
ReplyDelete